| “ | Those who don't appreciate life do not deserve life. | ” |
— John explains his moral beliefs to Eric[src]
| ||
John Kramer, commonly known as The Jigsaw Killer, is a fictional character from the Saw franchise, as well as the main antagonist of the first four movies and the main antagonist of the series as a whole. He is portrayed by Tobin Bell.
Biography
Early Life
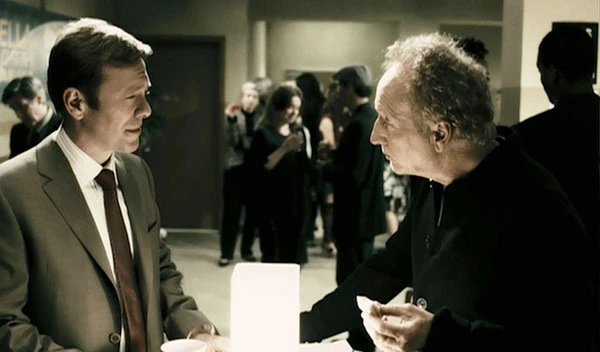
John talks to William Easton
John Kramer was a successful civil engineer and the founder of the Urban Renewal Group, a foundation dedicated to property development for needy people under the motto "Four walls build a home." The group was supported by his friend, partner and lawyer, Art Blank. His first building was the Gideon Meatpacking Plant at 11235 Blake Drive. John was married to Jill Tuck and encouraged her to open the Homeward Bound Clinic, a recovery clinic for drug addicts under the motto, "Cherish your life." During a party for the clinic, which was sponsored by William Easton, manager of the Umbrella Health insurance company, John and William got to know each other and got into a conversation about their work. Thereby, William explained the basic concept of his insurance formula to him, which he used to decide whose requests for coverage were permitted and which were denied. While he was visibly proud of it, John questioned the formula, stating that William decided about life and death of his clients. William tried to defend himself. John elaborated on his criticism and told William that he forget to take the survival instinct of his clients into consideration, which was the most important human element of all, according to him. However, despite their disagreements, John eventually became a client of Umbrella Health himself. (Saw IV, VI)
Gideon Kramer
Jill and John were expecting a child, which John had already meticulously planned to be born during the year of the pig in the Chinese zodiac. It was also him who gave their son his name, Gideon, the same name as John's first building. At some point, John obtained a new workshop that he proudly showed to Jill. Thereby, he showed her an old clock he had told her about and which was part of a deal he had made. This clock greatly fascinated him as the clockwork was almost 300 years old and still worked. As a surprise for her, he also presented Jill his self-made presents for Gideon, a cot and a wooden puppet, showing that he was just as devoted to his son as he was to his wife. However, he soon became worried about Jill's safety at her clinic when he interrupted a brawl between two patients, Cecil Adams and Gus Colyard. After having been separated from each other, Cecil pulled a knife from his pocket. John however told him to reconsider what he was about to do. When Cecil angrily asked him what his problem was, John responded that he was his problem and soon he'd be the problem of everyone else. Eventually, Cecil put the knife away. However, not much later John's worries about Jill's safety turned out to be justified nonetheless.

John and Jill at the hospital
One night, while John was waiting for Jill before the clinic, he made acquaintance with Addison Corday, a prostitute who offered him her company, which he rejected and instead told her to go home. Moments later, he saw Cecil coming out of the clinic. He was running away after he had attempted to rob Jill and accidentally slammed a doorknob into Jill's stomach, who was in her seventh month of pregnancy at this time, causing a miscarriage. Alerted by this, John ran into the clinic and found his wife. He brought her to the Angel of Mercy Hospital where he met Deborah, one of the nurses, who immediately took care of his wife. However despite all efforts the doctors weren't able to save the child. It was Dr. Steve who told John about his son's death. While John sat her bed and held her hand, Jill claimed that she only wanted to help the people in her clinic. John merely responded that she couldn't help them as they could only help themselves.
Following Gideon's death, John suffered from severe depression, causing him to withdraw from both his wife and the Urban Renewal Group. When his partner and lawyer, Art Blank, asked Jill about his whereabouts. As Jill didn't know where he was, they became worried and she helped Art to search him. Eventually, they went to John's workshop. Initially thinking he wasn't there, she ultimately spotted him sitting on a chair in a corner and asked him not to get mad at her for bringing Art to the workshop. Art then asked him how he felt and condoled over Gideon's death. However, he also tried to convince John to continue his work for the Urban Renewal Group as 40 needy families were waiting to soon move to the houses John and Art had been working on. John however, who was annoyed and angered by his visit, told Art to leave immediately. After initially refusing, Art eventually left and told John to call him once he felt better. Moments later, Jill left as well, reminding John that she was suffering from the lost of Gideon just like he did. Ultimately, his emotional detachment caused John to separate from her, telling her not to come back again. (Saw IV)
Terminal Diagnosis
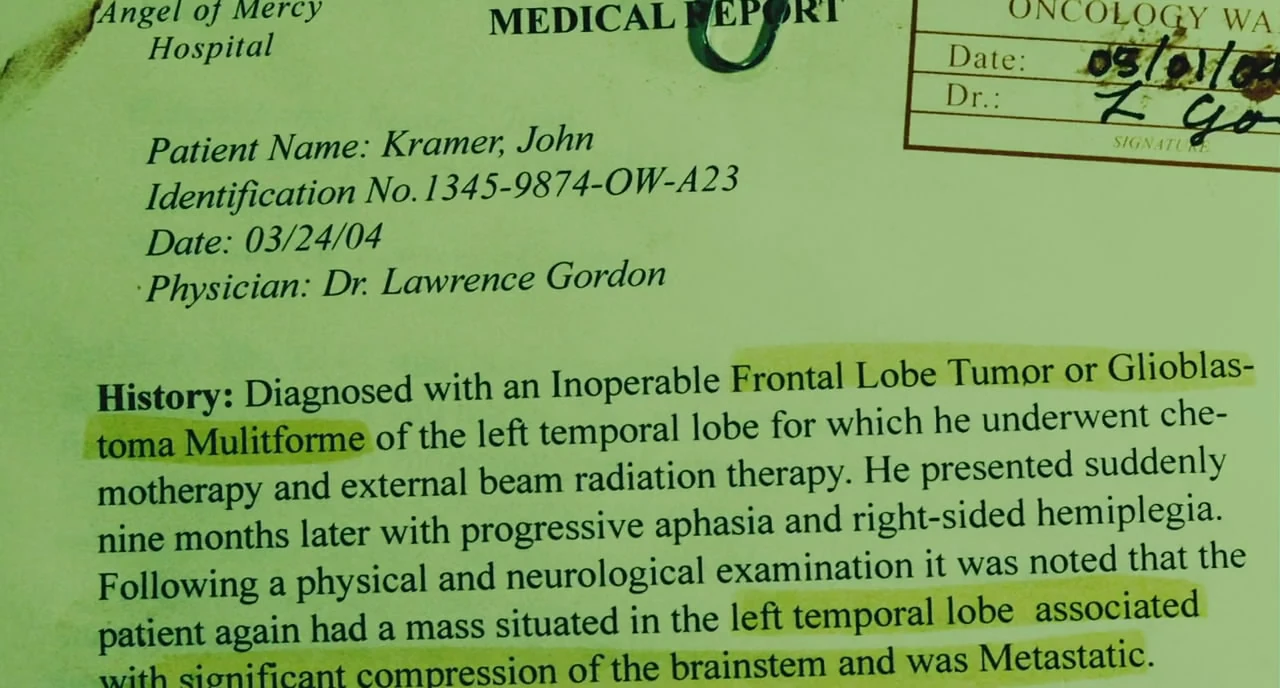
Dr. Gordon's medical report on John Kramer
Shortly thereafter, John's physical condition began to worsen dramatically, causing him to go to the Angel of Mercy Hospital where oncologist Dr. Lawrence Gordon diagnosed him with colon cancer and an inoperable brain tumor. John underwent chemotherapy, an external beam radiation therapy, and further examination by both Dr. Gordon and Dr. Lynn Denlon. Unfortunately, this wasn't successful, resulting in his illness becoming even worse as he didn't have much time left. (Saw II, III)
Despite the bleak prospects, John eventually found out about an experimental therapy developed by a doctor in Norway. However, when he asked Umbrella Health for bearing the treatment costs, his coverage requests were repeatedly denied. Due to this, he went to William's office, hoping that the latter might have an understanding if he explained the situation to him in person. While William was initially open for the discussion, he didn't change his decision and quickly destroyed John's hope by stating that the coverage was unfeasible for Umbrella Health due to John's age and the bad development of his cancer. Furthermore, he told him that he would be dropped from coverage completely if he wanted to seek out the experimental treatment nonetheless. Angered by this, John asked him if he thought that the living would have the ultimate judgment over him as the dead would have no claim over his soul, and indirectly threatened him by stating that he may be mistaken in that regard, before he threw the printout of his request in the garbage can and left William's office. (Saw VI)
Becoming Jigsaw
Utterly depressed, John attempted to commit suicide by driving his car off a cliff, but unexpectedly survived the crash despite being heavily injured. When he climbed out of the wreck, John realized that only when his death was imminent he finally began to actually appreciate his life. As he observed other people wasting their lives, he decided to spend the rest of his life on testing other peoples' will to survive, hoping to make them appreciate their lives just as he did. However, even his newly discovered will to live wasn't able to bind him and Jill together again and therefore, he continued to ignore her attempts to contact him. (Saw II, IV)


John abducts Cecil Adams
John's first test subject was going to be Cecil Adams. For several weeks John observed him and felt vindicated in his belief that only those who were close to death were able to value their life, as he saw that Cecil just continued his life after Gideon's death and didn't change in the slightest. John spent much of his time following Cecil and preparing himself emotionally for the first part of his self-imposed mission. When the time had come, he followed Cecil to a Chinese festival in celebration of the year of the pig. While doing so, he saw how Cecil spoke to a saleswoman. After distracting her, he quickly stole one of the small terracotta figures from her booth before vanishing. Using a pig mask filled with chloroform, John pursued, sedated and ultimately abducted Cecil. Then, he took him to his workshop and strapped him to a chair with blades, that were adjusted to the armrests and pierced his wrists.

Cecil awakes in Jigsaw's lair
When Cecil woke up, he initially panicked. When he recognized John, he begged him to let him go and apologized for what happened to Gideon, begging him to let him explain his situation. John merely claimed to have forgiven Cecil and had just put him in the trap to help him change his life. After a brief discussion, John showed Cecil a vicious contraption consisting of various knives. When his frightened hostage asked him what it was, John responded that this was the tool which would save his life. Afterwards, he adjusted the device to Cecil's chair so that the eight horizontally arranged knives were positioned right in front of his face. While doing so, he reminded Cecil of his crimes and failures and told him that he'd have to press his face into the knives in order to free himself from his restraints as otherwise, he would bleed to death. Cecil angrily insulted him and yelled for help. However, eventually he pressed his face into the knives. As he did so, the immense pain caused him to scream and struggle until after a few moments, the chair unexpectedly collapsed and thereby released him. However, instead of being grateful, Cecil approached John and tried to kill him. John however evaded the attack easily, causing Cecil to fall into a cage filled with razor wire, where he ultimately died in front of John's eyes. After his death, John cut a jigsaw piece from Cecil's skin as a symbol of his lack of will to survive and also took the stolen soldier figure from his corpse, which he kept as a memento from then on. Finally, he disposed of Cecil's corpse.

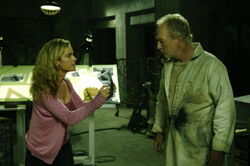
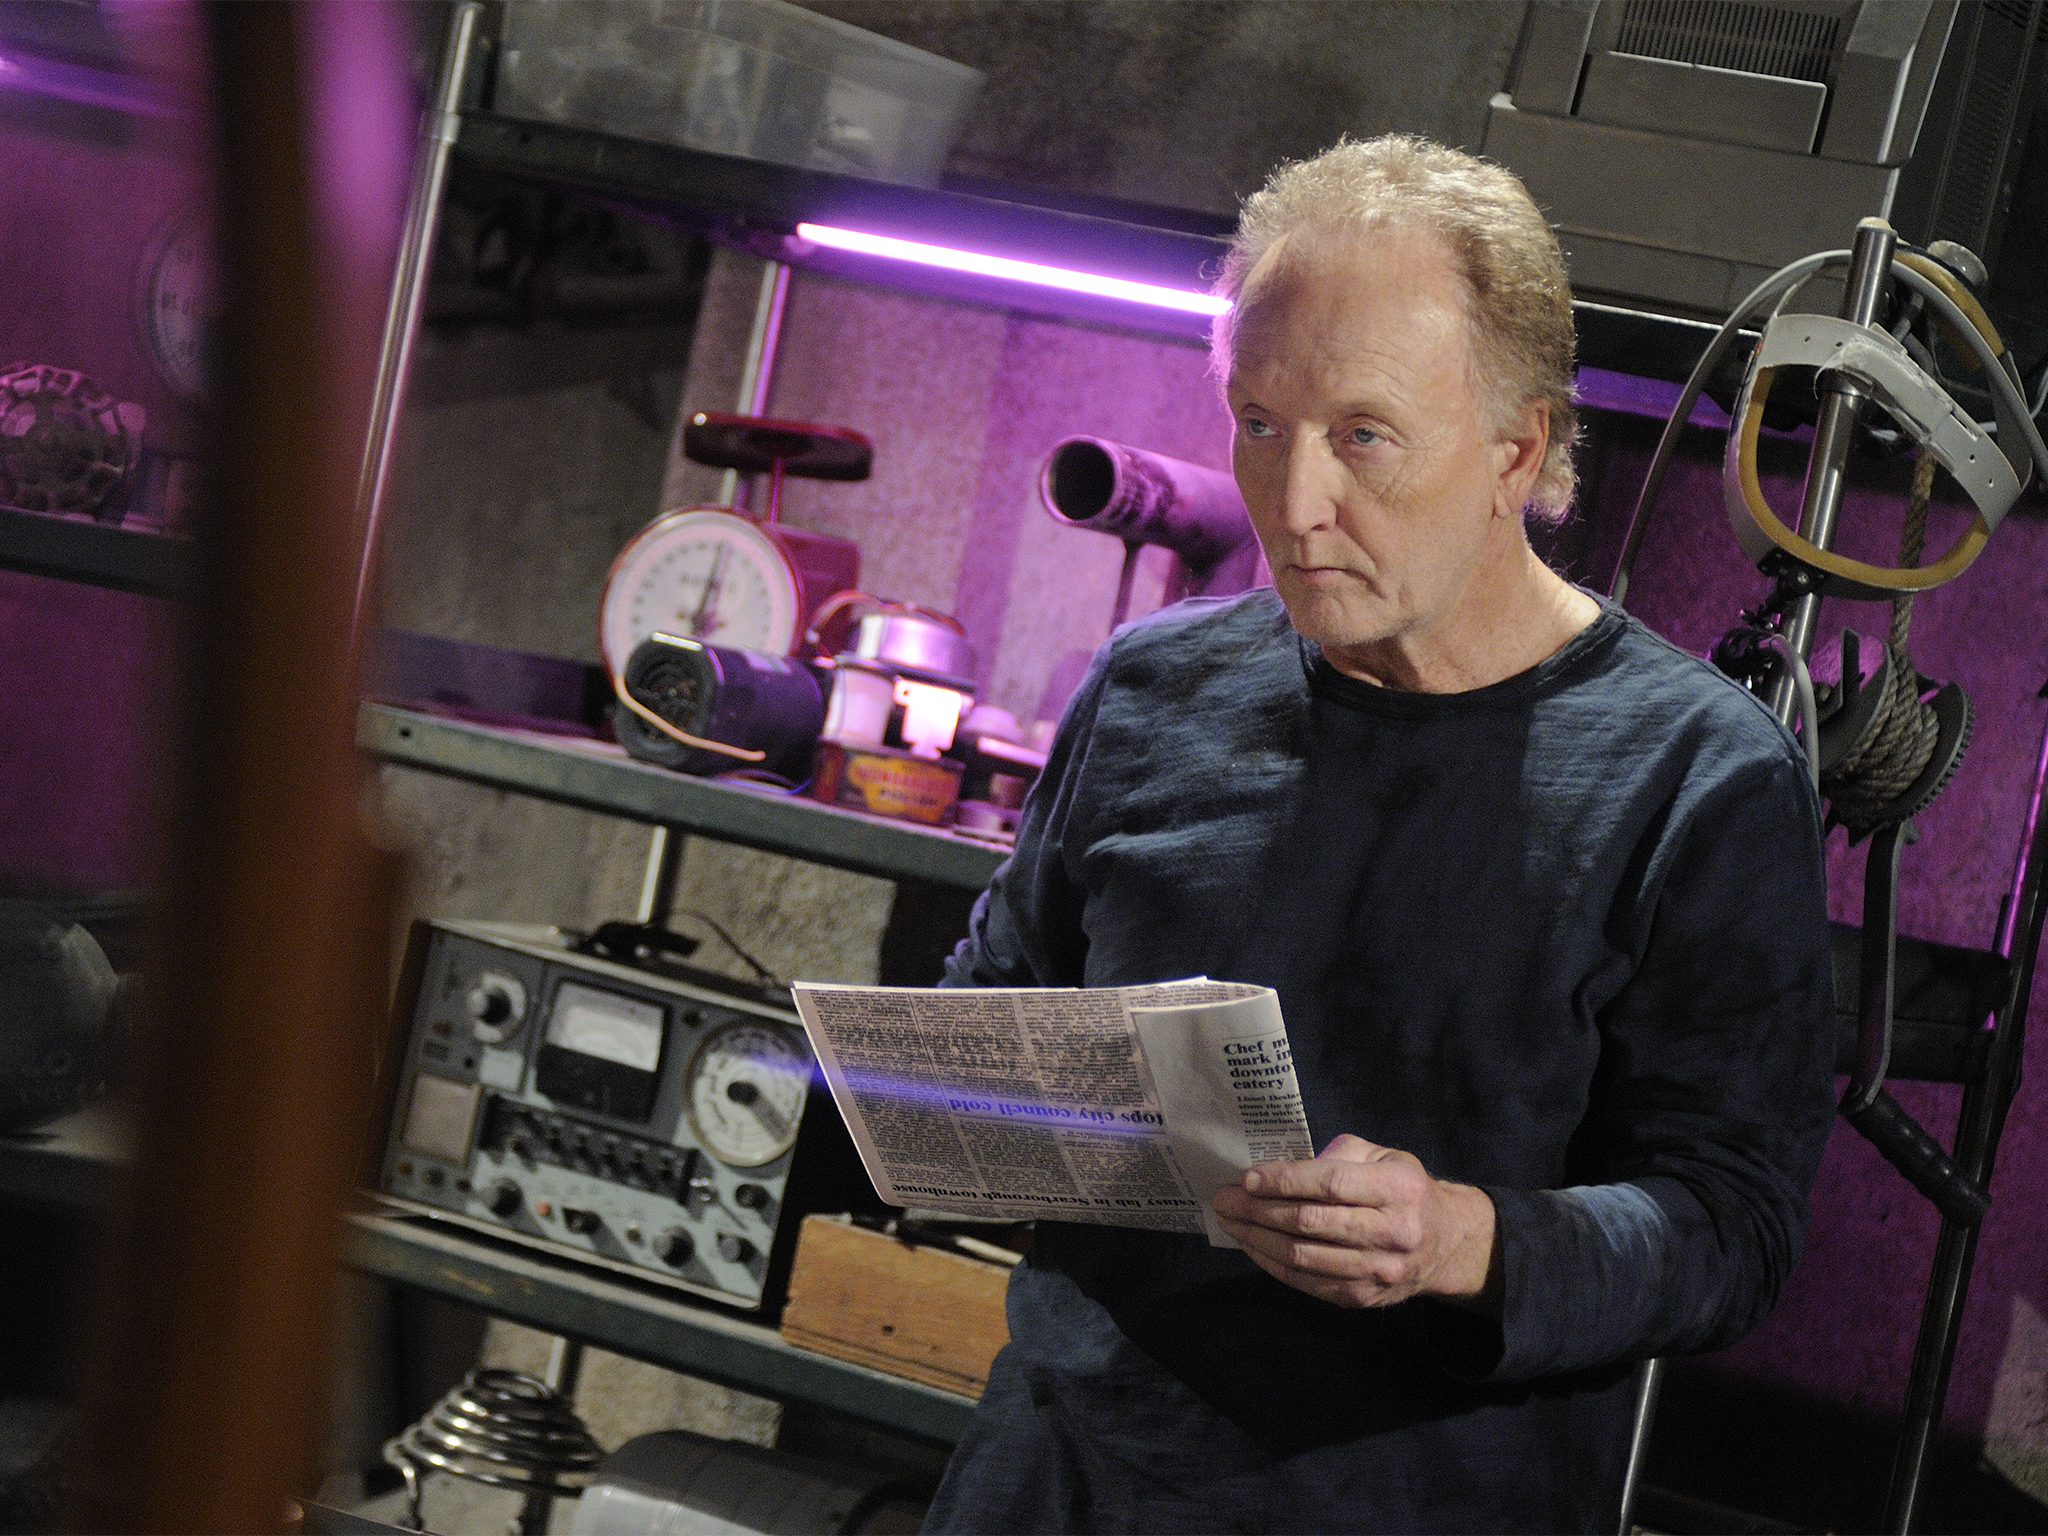
Jill confronts John with Cecil's photos
Shortly afterwards, Cecil's corpse was found by the police and reported to the public. When she learned about his death in a newspaper article, Jill went to John's workshop to speak with him as she was worried he might have something to do with it. Thinking she was alone, she searched the workshop and quickly found a bunch of photos of Cecil on a table. When she went further into the room, she discovered a big, elongated contraption hidden under a big cloth. However, as she was about to drag away the cloth, John suddenly appeared by her side and grabbed her arm, angrily telling her that he didn't want her to come. He tried to drag her out, but Jill broke free and confronted him with the newspaper and the photos, asking what he had done to Cecil. John however merely responded that he had taught him not to take his life for granted. Shocked by this, Jill asked him what had happened to him. Angered by this, John grabbed a crowbar and smashed the old clock with it before he managed to calm down again. Then, he told her once more to go away, which she subsequently did. (Saw IV)
Recruitment of Mark Hoffman
John continued with his deadly games and started to use a more sinister, mechanical version of the puppet he originally built for his son to give the test subjects their instructions. This puppet soon became one of his trademarks, aside from the jigsaw pieces he cut from his dead victims' skin. Soon John caught the attraction of the Metropolitan Police Department. Due to the jigsaw piece cut from his victims' skin, John was given the nickname "Jigsaw Killer", or simply "Jigsaw." One of the detectives involved in the case was Mark Hoffman, whose sister, Angelina Acomb, was murdered five years ago during a domestic dispute with her ex-boyfriend Seth Baxter, who was convicted to a life sentence for murder. However, due to procedural errors, Seth Baxter was released from prison after merely five years. One month later, Hoffman eventually abducted him and put him in an inescapable trap of his own, which inevitably killed Seth. After that, Hoffman cut a jigsaw piece out of his skin in order to make the murder appear to be another one of Jigsaw's tests.

John greets Hoffman
However, John was watching Hoffman during his investigation on the Jigsaw case and therefore knew that it was him who murdered Seth Baxter. John gathered evidence for Hoffman's guilt and sent him an anonymous message to his office at the police station, stating that he knew about his secret. When Hoffman, alerted by the message, returned home, he was already expected by John, who was waiting for him in an elevator. Together, they rode up, when Hoffman looked at the lift buttons and noticed that only his own floor was selected. At this moment, he realized that the other man seemed to hold something in his hand and asked him what floor he was going to while slowly reaching for his gun. However, before he could react, John suddenly attacked him and injected him with an anesthetic, causing him to pass out. After that, he took him to his workshop, where he strapped him onto a chair with a shotgun aiming at his head. As the detective woke up, John showed him a newspaper article about the murder of Seth, labeling it as a distasteful act of imitation and thereby revealing himself to be the actual Jigsaw Killer. Hoffman tried to free himself but stopped when John placed a mirror in front of him, showing him that his arm restraints were connected to the shotgun's trigger by a wire. They engaged in a discussion, during which John confronted him with Angelina's death, his drinking problem and his revenge on Seth.

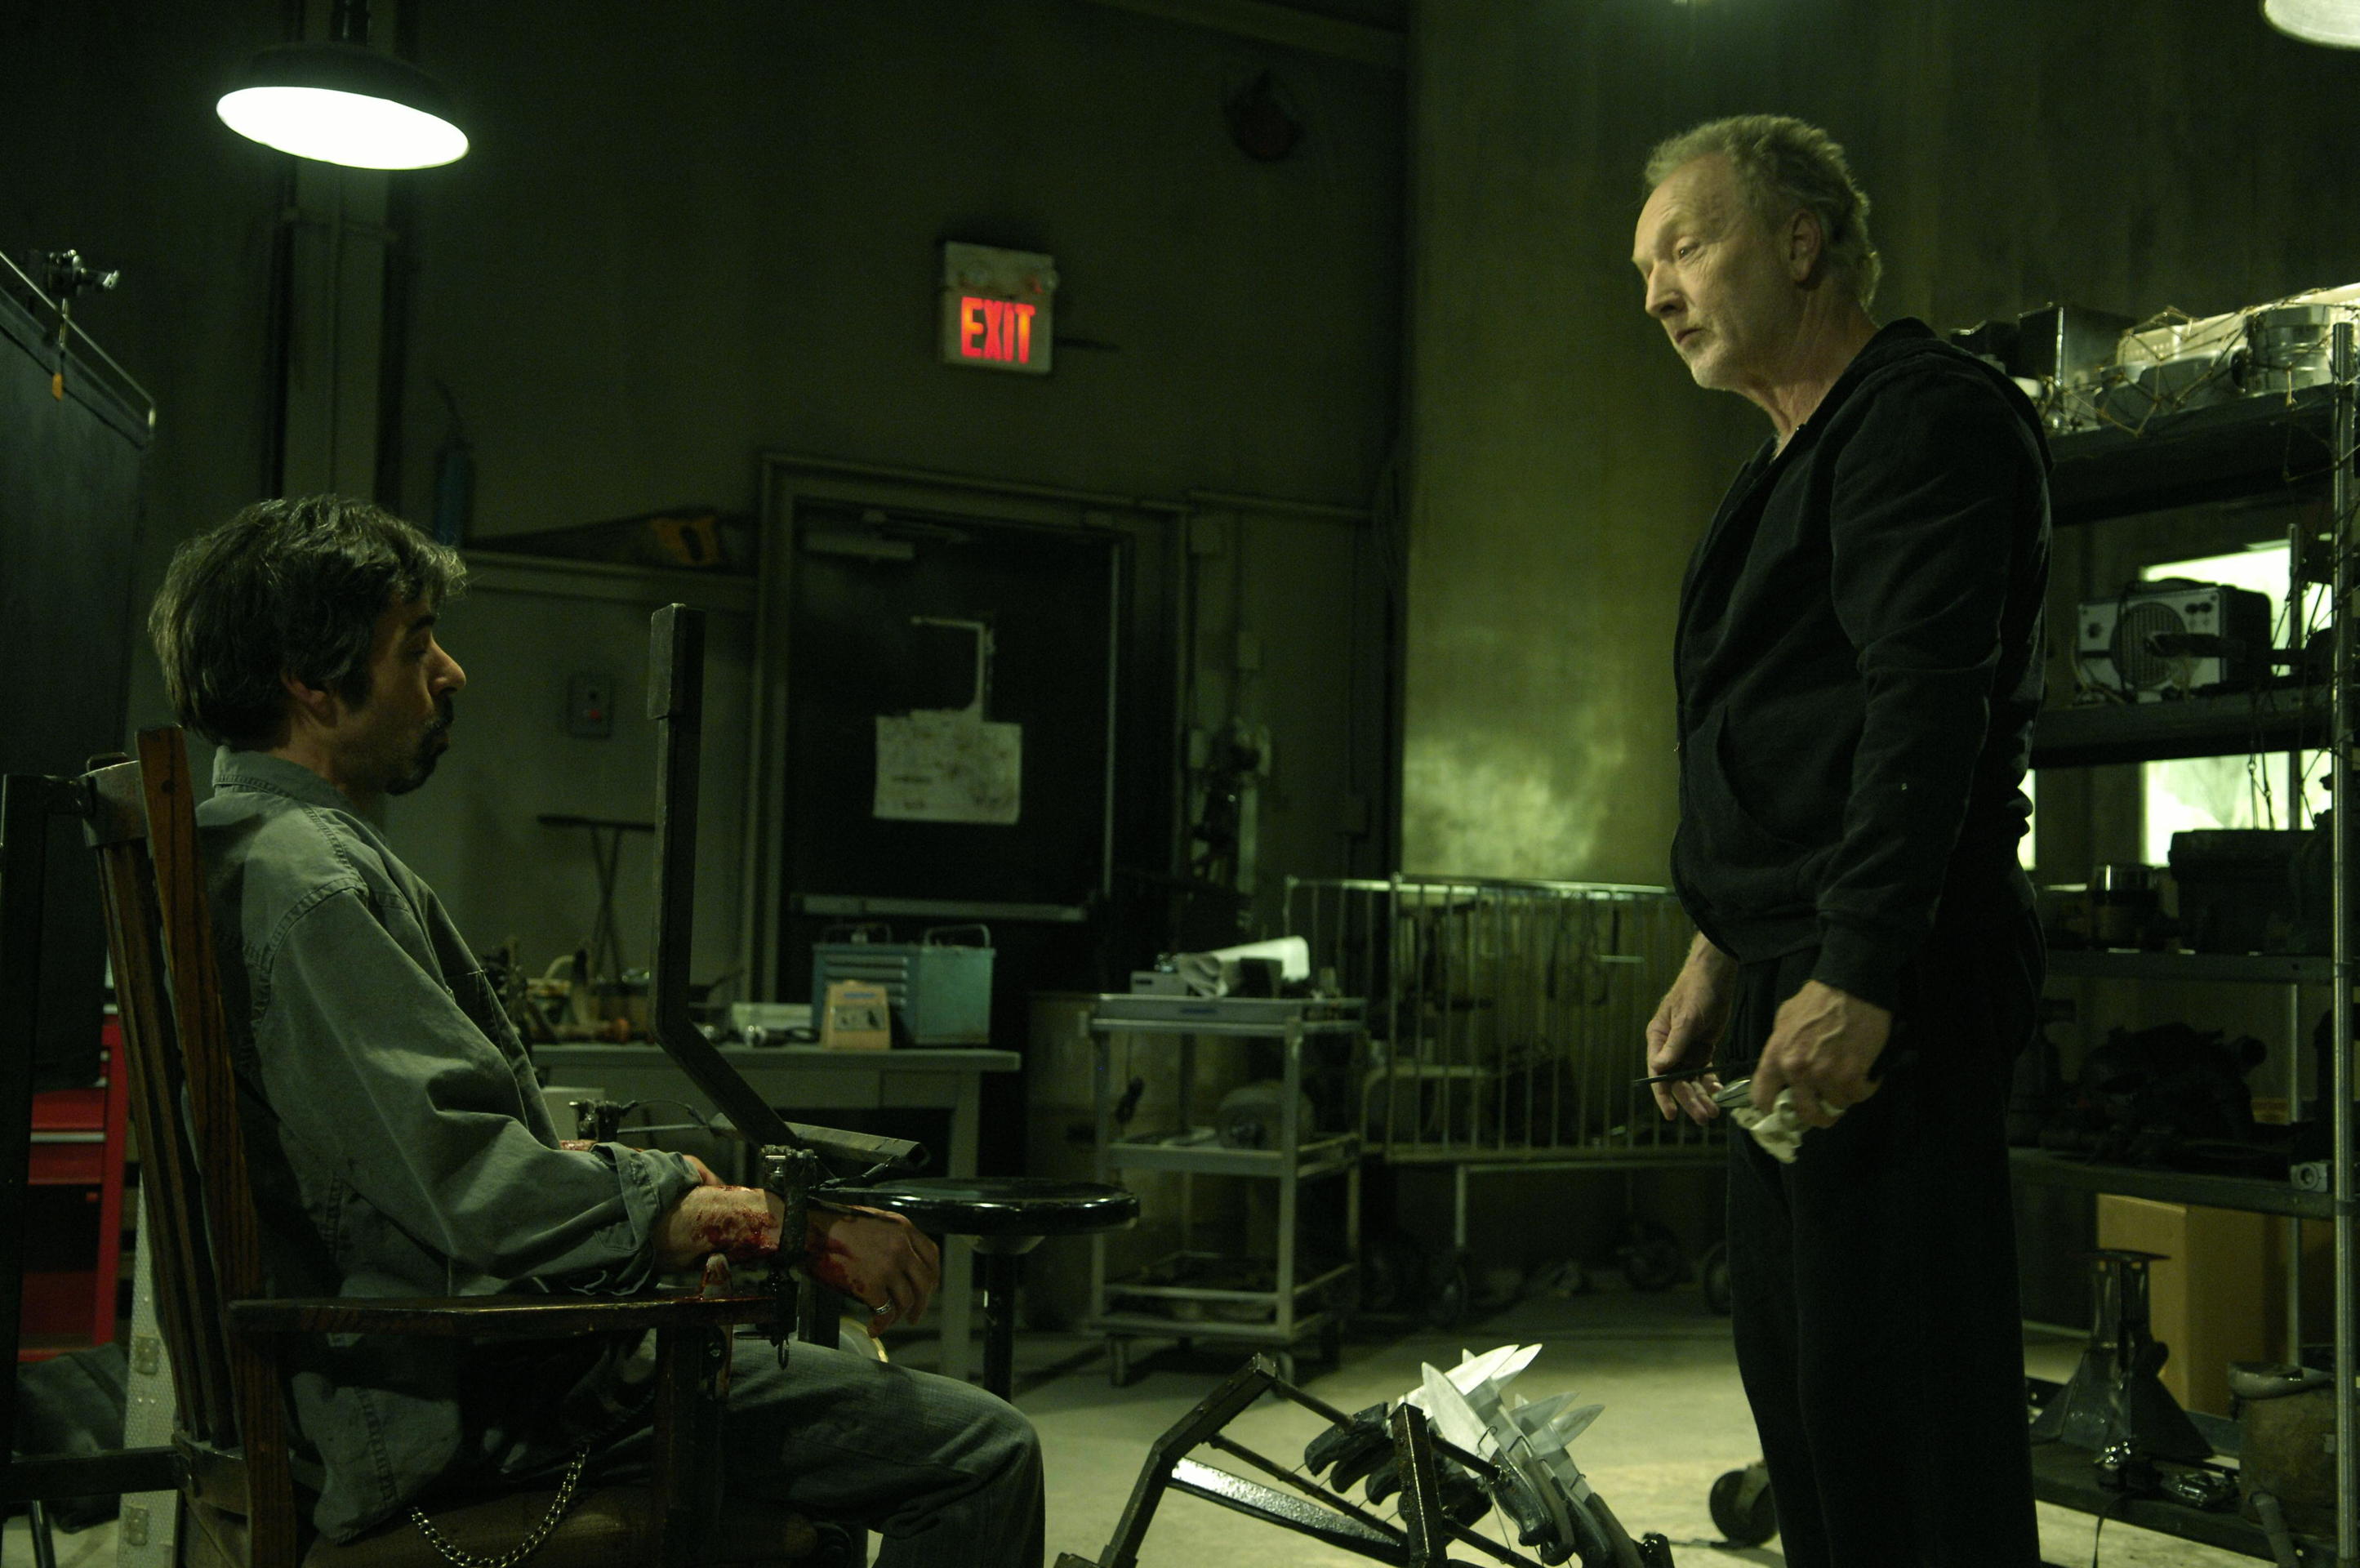
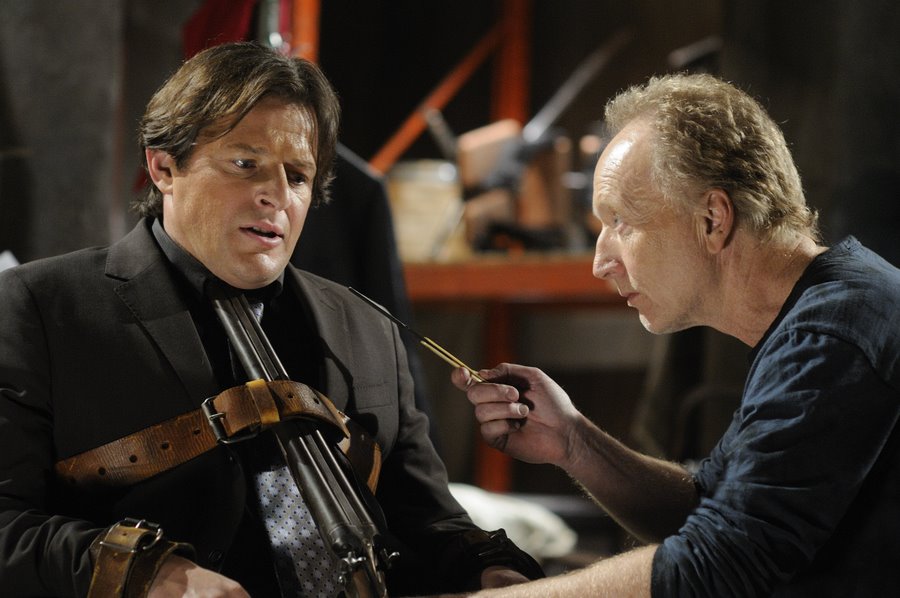
John, giving Detective Hoffman his ultimatum
Hoffman claimed that Seth hadn't deserved a chance to survive, which angered John as he saw killing as something vicious and distasteful, claiming that he himself gave all of his victims a chance. When he put his finger on the trigger, Hoffman prepared to die. However, when John pulled the trigger, he realized that the shotgun wasn't loaded. Moments later, John ultimately freed him from his restraints and offered him a choice: Hoffman could either become his apprentice and help him setting up his future games or John would publish the evidence against him and send it to the police. Hoffman said that he could also kill him as no one would believe John more than him. John however remained calm and asked him if he really wanted to ruin his own life for the legal system that had released Seth Baxter from prison. After a short argument, Hoffman finally agreed to John's offer. (Saw V)
The first victim to be tested by them was Paul Leahy, a patient at the Homeward Bound Clinic who unsuccessfully attempted to commit suicide by slitting his wrists one month prior to his game. When John and Hoffman followed him, they found him in his car, about to attempt suicide once more. However, he was interrupted when they attacked him, disguised with pig masks. Paul tried to fight them off but was ultimately sedated by John. After that, they took Paul to the basement where he had to play his game, while his abductors were hiding next door and witnessed his game through a peephole. During the game, Hoffman stated to be surprised to feel remorse, to which John responded that he had to abandon all emotions during their work. While the game was going on, Hoffman warned John about Detective David Tapp, another cop who was after him. John gave Hoffman a penlight he took from Dr. Gordon and told him to lead his colleagues on the doctor's trail. When Paul died from blood loss they left their hideout and cut a jigsaw piece from his skin. (Saw, V)
Recruitment of Amanda Young
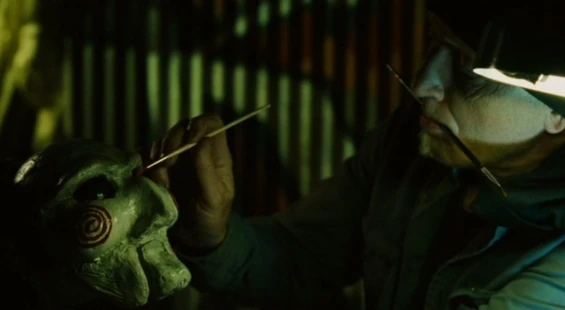

John builds a new version of Billy to use it for Amanda Young's game.
A few weeks later, John and Hoffman prepared another game to test their next subject, Mark Wilson. However Mark didn't survive his game as well. After his death, his abductors cut a jigsaw piece from his body as well. Additionally, Hoffman placed Dr. Gordon's penlight at the crime scene. Afterwards, John arranged another game. He abducted two other patients of the Homeward Bound Clinic, Amanda Young, who was the one who persuaded Cecil to the robbery which caused Jill's miscarriage, and Donnie Greco. He put one of his newest devices, the Reverse Beartrap, on Amanda and placed the key for it in Donnie's stomach. When Amanda woke up, she received her instructions from Jigsaw's puppet talking to her via a video tape. In order to free herself from the trap, she killed Donnie, who was still alive but paralyzed by an opiate overdose, and took the key from inside his body, making her the first survivor of one of Jigsaw's games.


Amanda's baptism
After Amanda's survival, John returned to the Angel of Mercy Hospital for a routine examination, where he got to know Zep Hindle, one of the orderlies. During this visit, Dr. Gordon, who was responsible for John's examination, was interrogated and taken to the police station by Detective Tapp and his partner Detective Steven Sing after they found Gordon's penlight, which had been placed at the crime scene of Mark Wilson's game by Detective Hoffman. On the same day, John left the hospital and invaded Amanda Young's apartment. After she came home from her own interrogation at the police station, John confronted her, telling her not to be afraid of him and that her life had just begun. Believing that John had actually helped her by putting her in her game, Amanda agreed to become his second apprentice. During a baptism ceremony, John successfully converted her to his beliefs and gave her the instructions for her first game. (Saw, III)
After the ceremony, John visited Jill at her clinic to talk to her about their work. While he deemed his one work necessary, he told Jill that her work at the clinic was for nothing as he believed that her patients were only using her and her good nature and only came to her to avoid their prison sentences. Furthermore, he didn't believe that her methadone therapy was successful as it made no difference if her patients were addicted to their own drugs or the methadone. Jill tried to explain that they only needed time to overcome their problems. This made John angry, causing her to yell at her, claiming that no one would appreciate life without having a close experience with death. However, he calmed down and finally revealed Amanda to her. John then tightly hugged his ex-wife and reminded her how she had already given up on Amanda, calling her a "lost soul". However, Amanda had overcome her drug addiction and claimed that it was John who had helped her. (Saw VI)
Evading Apprehension

John returns to his hideout
Continuing his mission, John abducted his next test subject, Jeff Ridenhour, and took him to his hideout in an abandoned mannequin factory on 213 Stygian street, formerly occupied by a gang named K2K, where he put him in another trap. However, by investigating the tape of Amanda Young's game, Tapp and Sing managed to find John's hideout and invaded the factory, waiting for him. When John arrived and approached Jeff, they caught him by surprise, but instead of letting them arrest him, he activated Jeff's trap, forcing the detectives to take action. While Sing desperately tried to stop the two drills that were about to pierce Jeff's head, Tapp held John at gunpoint, but was distracted when Sing decided to shoot the drills. Using his chance, John slashed Tapp's throat with a hidden blade and ran away from Detective Sing who then pursued him. Eventually Sing managed to shoot him, causing him to collapse. Thinking that John was dead, Sing approached him but unwittingly walked right into a booby trap in the hallway and was shot dead by four shotguns. John, who wore some kind of body armor under his cloak and therefore remained unharmed by the shot, stood up and left the hideout, leaving the detectives and Jeff behind. (Saw)
Adam Stanheight and Lawrence Gordon's Test
After his escape from the mannequin factory, John decided that it was time to test his doctor, Lawrence Gordon, for his cold, uncaring attitude towards his patients. When observing him, he became suspicious of Adam Stanheight, a young photographer who was hired by Tapp to observe Lawrence. Tapp was obsessed with the idea of Lawrence being the Jigsaw Killer but couldn't go after him on his own, as he had been discharged from the police department after Sing's death. This prompted John to test Adam as well.


John posing as a corpse
When the time for the game had come, John and Amanda abducted Adam and Gordon and brought them to a grimy industrial bathroom located in an underground tunnel network. Both of them were chained by the ankle to pipes in opposite corners of the room. While Amanda abducted Adam, John placed the clues and items needed for the game in the bathroom, which were in detail: a camera hidden behind a one-way mirror, a bag containing two hacksaws as well as the photos of Gordon that Adam took throughout the days prior and one of Zep Hindle at the window of Gordon's apartment, a box containing a cellphone, a message and two cigarettes, and a photo of Gordon's abducted wife and Diana, who were abducted and held hostage by Zep as part of his own test, with a message on its back which was placed in Gordon's wallet. Furthermore, both of them had an envelope in their pockets, with Adam's containing merely an audio tape and Gordon's containing a tape, a key to the box with the phone and the cigarettes, and a single bullet. When Amanda finally arrived, they finished their preparations. While Amanda placed Adam's body in a water-filled bathtub and tossed the key to his chain on his stomach, John used make-up and fake blood to disguise himself as a corpse who shot himself in the head. He injected himself with a drug that slowed his heartbeat and relaxed his muscles before laying down in a puddle of fake blood in the middle of the room. He held a tape recorder and a remote control to electrocute the prisoners' chains in one hand and an empty revolver in the other hand. After finishing the preparation, Amanda turned off the lights and closed the door, leaving John and his test subjects in the bathroom.
Shortly thereafter, Lawrence and Adam woke up. When Lawrence turned on the lights, they were initially shocked to see the corpse lying between them. After finding the audio tapes in their envelopes, Adam tried to use the plug from the bathtub to obtain the recorder from John's hand and after some unsuccessful attempts eventually managed to do so. The tapes recorded by Jigsaw gave them the instructions they had to follow in order to win their game. Lawrence had to kill Adam by 6:00. Otherwise, his wife, Alison, and his daughter, Diana, would be killed by Zep Hindle, who held them hostage as part of his own test and was told to kill them and Gordon afterwards if Lawrence didn't kill Adam in time. Adam, however, was merely told to survive until the end of the game.
Listening to the clues provided by the tapes, Adam searched the toilet tank, which was marked with a heart, and found a plastic bag inside that contained a pair of hacksaws, as well as the photos of Gordon he took throughout the days prior to the game. When they tried to cut through their chains with the saws, Adam's saw quickly broke, leading him to angrily throw it against the mirror, which broke a piece of glass out of it. After unsuccessfully trying to cut through his chain as well, Dr. Gordon soon realized that the saws were not strong enough to cut through their chains and were actually meant to cut off their feet. He then told Adam about the Jigsaw Killer and how he himself was interrogated as a suspect five months ago.
Following the clues given to them by John, they finally managed to find the box with the cellphone, the cigarettes, and a message for Gordon which told him that he wouldn't need a gun to kill Adam and hinted at the blood of the dead man in the middle of the room being poisoned. Lawrence tried to use the phone to call the police, however, this attempt remained unsuccessful as the phone was only meant to receive calls, not to make them. Lawrence formulated a plan to stage Adam's death by using one of the cigarettes. He gave one of the cigarettes which wasn't poisoned to Adam, who then pretended to die. However, this plan was quickly thwarted when John used his hidden remote control to electrocute Adam through his chain. The game continued until the clock finally struck 6:00, marking the end of the game as well as Lawrence's failure.
Lawrence was then called by his wife, Alison, and heard shots and screams in the background, causing him to panic. He was then electrocuted by John, rendering him unconscious for some mere seconds. Adam desperately tried to wake him up and eventually managed to do so. However, this caused Lawrence to further panic, as he didn't know that his family actually managed to escape from Zep. Despite Adam's frequent attempts to calm him down, Lawrence began to cut off his foot while a screaming and horrified Adam was forced to watch. When Lawrence grabbed the dead man's gun and aimed at Adam, the latter begged for his life, but Lawrence shot him in the shoulder with the bullet from his envelope, intending to kill him, which caused Adam to collapse.
Shortly after, Zep entered the bathroom to kill Lawrence. However, Adam, who had survived the gunshot, knocked him to the ground and started to fight for Zep's gun. Adam eventually managed to get the gun out of Zep's hands and bludgeoned his head with the lid of the toilet tank. Lawrence promised to find help for Adam and crawled out of the bathroom, leaving Adam behind. Ridden by fear, Adam searched Zep's body for a key to his shackle but instead found another tape recorder, which revealed that Zep was merely another victim of Jigsaw.

John seals Adam Stanheight in his tomb
After listening to the tape, the man in the middle of the room who was thought to be dead the entire time stood up and revealed himself to be the actual Jigsaw Killer. When he told Adam that the key to the shackle was in the bathtub, Adam recognizes how it went down the drain when he woke up. Terrified, he grabbed Zep's gun and attempted to shoot Jigsaw, but was electrocuted by the latter's hidden remote control. After that, Jigsaw turned off the lights, before closing the door and leaving Adam to die in the darkness of the bathroom with the words "Game Over." (Saw)
Recruitment of Lawrence Gordon

John finds Dr. Gordon
Due to his injuries and massive loss of blood, Lawrence wasn't able to make it very far. He soon reached a hot steaming pipe in the hallway leading to the bathroom, and after some hesitation pressed the stump of his severed foot against the pipe in order to cauterize the wound. However, the immense amount of pain caused him to lose consciousness. Moments later, he was found by John. He took Gordon with him and during a brief regain of his consciousness, Lawrence recognized his patient, who smiled at him and congratulated him for his survival before Lawrence passed out again. When he finally awoke, he panicked as John was taking care of his wounds, but eventually calmed down when he fitted a prosthesis as a replacement for his foot. His treatment caused him to trust John, despite the things the latter did to him, and eventually, he was convinced to become another one of John's assets. (Saw 3D)
Preparations for the Future


John comforting Amanda
After the end of Adam and Gordon's game, John and Amanda returned to their hideout. One night, John woke up after Amanda had a nightmare due to her feelings of guilt for abducting Adam and chaining him up in the bathroom. However, John pretended to still be asleep, and unbeknownst to Amanda, he witnessed her when she left the hideout to return to the bathroom and put Adam out of his misery by killing him. Eventually, this only worsened her feelings, driving her to deal with her emotional stress by self-harming. Due to her unstable state of mind, John comforted her and tried to make her feel better, but he soon realized that in this state, she could become dangerous for their mission and their test subjects. (Saw II,III)


John visits Bobby Dagen's autograph session
Despite this, John continued his games and tested other people throughout the next months, like Joan, another woman who was able to survive his tests. Unfortunately, her story inspired a man named Bobby Dagen and his best friend Cale to make up a story of Bobby being a Jigsaw survivor in order to gain fame and success. When Bobby actually published his story in his book "S.U.R.V.I.V.E. - My story of overcoming Jigsaw", he soon caught the attention of John. He attended an autograph session organized by Bobby's publicist Nina. When talking to Bobby, John hinted at his knowledge of Bobby's story being a lie, but was interrupted by Cale when Bobby had signed John's copy of the book. John thanked him for the autograph, but gave him the book cover of his copy, which showed a photo of Bobby, claiming that he wouldn't need it anymore, as they know each other now. After that he left the session. (Saw 3D)
When John realized the great extent of Bobby's lies, he decided that there were many more people who had to be tested. However, as his condition worsened, he already anticipated that he wouldn't be able to test all of them on his own before his passing. Therefore, he prepared the games for his apprentices, who had to put everything in place once he was dead. There were many people going to be involved in the games, including a group of five persons who were all in some way involved in a fire which killed eight people, William Easton and the employees of his department at the Umbrella Health Company as well as his sister and the family of one of his former clients, Bobby Dagen, his wife and his entire crew, money lenders Simone and Eddie and even his own apprentice, Detective Mark Hoffman. Within the following months, John recorded the tapes for these games, designed the traps and gathered information about his future test subjects. Furthermore, he gave a black box to his executor Bernie Feldman and ordered him to give it to Jill in case of his death. The box included photos of the test subjects of William's game, a videotape for Dr. Gordon which instructed him to watch over Jill, and a modern looking version of the Reverse Beartrap for Detective Mark Hoffman, as well as a videotape for Jill. (Saw V, VI, 3D)
The Nerve Gas House
Besides the preparation of these tests, John was also determined to play some more games on his own, and therefore targeted Eric Matthews, a corrupt detective who had faked the evidence in some of his cases, resulting in the arrest and conviction of Jonas Singer, his manager Gus Colyard, the prostitute Addison Corday, the drug dealer Xavier Chavez, Laura Hunter, Obi Tate and even Amanda Young, which was the reason why she became addicted to heroin. In order to test Eric, John and his apprentices prepared another game, which was going to be directly connected to Eric's test. Therefore, Detective Hoffman obtained the police files of the seven people framed by Eric, as all of them were going to be tested as well.


John hides the instruction tape
To accelerate their proceedings, John hired Obi Tate to help him with the abduction of Detective Matthews' son, Daniel, and the other five people, except for himself and Amanda, while John prepared the traps for each one of them. After all of them were abducted, they were brought to an old abandoned house, directly connected to the underground tunnels, leading to the bathroom where Adam and Gordon's game took place several months earlier. Hoffman finally abducted Obi as well and took him to the same house as the other prisoners, making him the last test subject of the game. All of them were unconscious and lay on the floor of a room with a large safe. Among them was also Amanda, who played as a victim on her own, primarily to make sure that the rules were followed by everyone. John placed the tape recorder containing the instructions behind a wall and helped Hoffman to install a booby trap connected to the lock of the room's only door. Having finished all of their preparations, John and Hoffman left the room, locked the door and started to pass a deadly nerve agent into the room. (Saw II, V)
Eric Matthews' Test
While the game was going on, John abducted Michael Marks, a police informant working for Detective Matthews and a patient at Jill's clinic. During a surgery, Dr. Lawrence Gordon placed a key behind Michael's right eye. After that, Michael was placed into another trap called the Death Mask. When he awoke, he received his instructions via a video tape. Given only 60 seconds to cut out his eye and obtain the key to escape the trap, Michael attempted to do so but ultimately failed, resulting in his death.
After that, John returned to his hideout at the Wilson Steel Plant and waited for Amanda, who arrived later on with the unconscious Daniel Matthews, the only survivor of the Nerve Gas House besides her. John locked Daniel up in a safe, together with a sufficient supply of oxygen, and prepared a video broadcast of the game's recordings in another house at 237 North Hyde Crescent, which was almost identical to the actual Nerve Gas House. After that, he set up a booby trap and waited for the police to arrive at Wilson Steel, as John left a message for Detective Matthews at the crime scene of Michael's death, which was found soon afterward during an asbestos disposal.


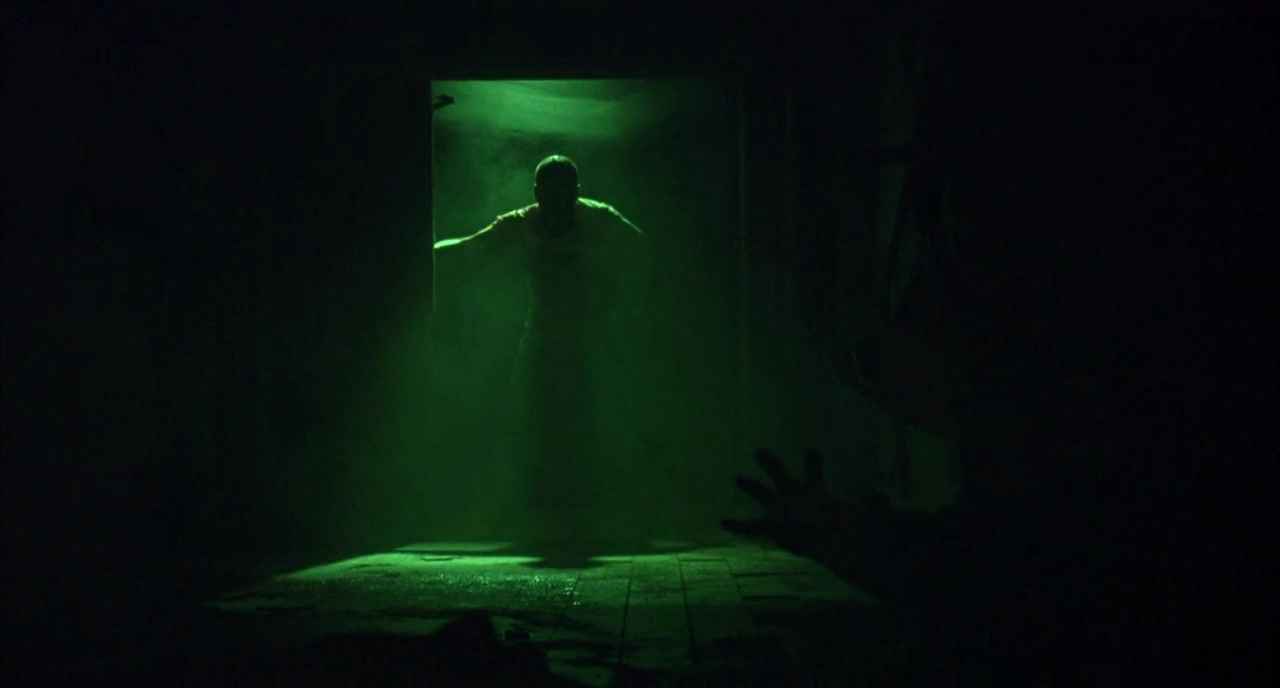
John waiting for the police to arrive.
The day after Michael's death, Detective Eric Matthews, Detective Allison Kerry, and a SWAT team led by Sergeant Daniel Rigg arrived at John's hideout, who was warned of their presence when the booby trap was set off by three SWAT officers, leaving two of them dead and Officer Pete Baker heavily injured. When the remaining police forces reached John, Officer Rigg ordered his men to arrest him. However, they refused to do so after John told Eric it'd be best if John stayed where he was until Eric took care of his "problem". He then instructed Eric to watch the surveillance monitors in the next room. When Eric saw the recording of the game at the Nerve Gas House, thinking it was a live broadcast, he immediately attempted to attack John, but was inevitably held back by Rigg. John then explained to him the rules of his test. Eric's colleagues had to leave the room, while Eric merely had to sit down and talk to John for a period of two hours, until a timer went off and caused John's safe to open, revealing Daniel Matthews, who was still trapped inside, unbeknownst to his father. However, he didn't tell Eric that the game's broadcast was only a recording.
After Kerry convinced him that it was the best to do what John wanted, Eric reluctantly accepted to play his game, but secretly placed a walkie-talkie beneath his chair, so his colleagues could hear their conversation. When they began to talk, John introduced himself to Eric. During the test, he frequently provoked Eric by talking about his violent behavior towards a suspect approximately five years ago and the bad relationship he had with his son after he cheated on his wife with Kerry. However, he also wanted Eric to understand him and his work, and therefore told him about his cancer and the failed suicide attempt, which led to his appreciation of life. He also told him details about his mission, like the true meaning of the jigsaw pieces he cut from his victims' skin, which the police thought to be just a signature to mark his victims. During this conversation, he compared the message of his own work to Darwin's evolutionary theory of the survival of the fittest, stating that only those who have the ultimate will to live are able to overcome his games and survive.
However, as the timer was ticking down and Eric's desperation grew, he tried to provoke John by destroying all of his notes and plans he had in his hideout. Remaining unimpressed by Eric's outburst of rage and his threats to kill him if he didn't get his son back, John just calmly watched him and casually commented that he wouldn't bring him in by destroying all the evidence. Eric then stopped his tantrum when the technical team arrived to trace the recordings of the game. When he decided to end his talk with John, the latter told him to take a look at the files of the seven people once framed by Eric for crimes they didn't commit and commented that they were about to find out that Daniel, whom Eric thought was still trapped with them, was his son.
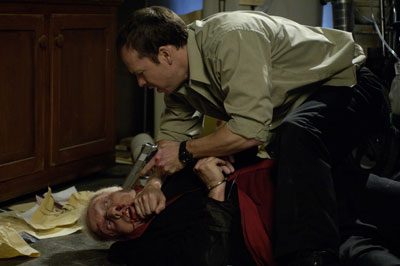
John getting beaten up by Eric
When the recordings showed to him how his frightened son was pursued by Xavier Chavez, Eric brutally beat John up and threatened him with his gun, forcing him to disclose Daniel's whereabouts. Heavily injured, John ultimately offered to take him to the house, but demanded to go there with Eric alone. Eric agreed and left the building with John in a hidden elevator. Pursued by the SWAT officers, Eric and John took one of their armored vehicles to flee. While on their way, John told Eric how to get to the Nerve Gas House, while the SWAT team went to the other house at 237 North Hyde Crescent, from where the recording came. When they arrived at the house, John gave Eric the key and waited in the car. He already knew that Amanda was hiding in the bathroom beneath the house, and was going to imprison Eric and chain him up there, just as they once did with Adam and Dr. Gordon. (Saw II)
Final Preparations
When Amanda came out of the house with severe injuries, John knew that something went wrong and told Hoffman to look for Eric without Amanda's knowledge. John and Amanda then went into hiding, as their identity was now revealed to the police. Due to his worsening health, which eventually resulted in a right-sided hemiplegia, John became weak and bedridden and was more and more forced to rely on his apprentices, including Amanda, even though he knew of her unstable state of mind. Knowing that he was going to die sooner rather than later, he began to plan his final games. He targeted many new victims and prepared their games with the help of his accomplices, while he himself stayed in his hideout at his first building, the Gideon Meatpacking Plant. (Saw III)
About two weeks before the final game began, John told one of his assets to abduct his former lawyer and partner, Art Blank, and a man named Trevor. It was Lawrence Gordon who arranged their game by sewing Art's mouth and Trevor's eyes shut and forcing them to play another one of John's games in a mausoleum. After killing Trevor and escaping his trap, Art was forced to prepare a series of games which involved the FBI special agents Peter Strahm and Lindsey Perez, Officer Daniel Rigg and Detective Eric Matthews, as well as three former clients defended by him. (Saw IV)
Four days before the final game, John ordered Amanda to test two more subjects, Troy, a patient at Jill's clinic, and Detective Kerry. However, he learned that Amanda gave them no chance to win their games, intentionally killing them in the process. This caused him to realize that Amanda, whom he had originally planned to continue his work after his death, was too dangerous, and therefore decided to test her once more. (Saw III)
John targeted another test subject, Jeff Denlon, a man who only lived for his thirst for revenge, after his son died in a car crash caused by a drunk driver three years ago. John also incorporated his wife, the renowned surgeon Dr. Lynn Denlon, in the game as she was suggested to him by Gordon. (Saw II, 3D)


John observes Hoffman's work on the "Rack"
On the day of the last games, Amanda was leading John to his room, when they came across Mark Hoffman, who prepared another trap called "The Rack" by John. When John saw that Hoffman switched the trap's gear ratio, he told him that he'd have to change the gear grease to match the increased friction and berated him for making these changes without asking him first, stating that he would do so next time. When Hoffman asked him how many next times there were going to be, John merely answered that their work would go on as long as necessary. Hoffman then recklessly dumped Timothy out of the wheelbarrow and was therefore berated by John for his brutal behavior, who reminded him that Timothy was still a human being after all. When he asked Hoffman if he liked this kind of brutality, Hoffman responded that John wanted to see Timothy suffer just as much as he did. This resulted in a short argument between Hoffman and Amanda who asked him when he was going to get tested on his own. Hoffman responded that this was unnecessary as he claimed he had always appreciated his life unlike her and showed her the scars she had inflicted on herself. Amanda mocked him, telling him he should get used to her as he wouldn't get rid of her anymore to which he responded that she shouldn't be so sure about it. When John interrupted them by saying it was time to go on, Amanda took him to his room and left Hoffman alone. (Saw III, VI)


John and Jill see each other for the last time
On their way to their makeshift sleeping quarters, they unexpectedly crossed the path of Jill. John then sent Amanda to go after Lynn Denlon and bring her to the plant. Once they were alone, John asked Jill why she had come. Jill begged him to finally stop his work. In return, John promised that he had already provided a way out for her and handed her a key. When she asked him what it was for, he closed her hand around the key and merely told her that she would know it when the time came. This was the last time John met with her during his waking life. After he was alone, he went through the building and put the last requisites for Jeff in place, before finally returning to his room and waiting for Amanda to arrive with Lynn Denlon so his last game could finally begin. (Saw VI)
Shortly before their arrival, Hoffman visited John one last time in his room. John ordered him to prepare another series of tests and therefore handed him a file which contained the photos of five new test subjects: Ashley, Charles, Luba Gibbs, Mallick and Brit. Furthermore he told them that all of them were somehow connected to each other. When they heard Amanda coming in and Lynn Denlon screaming for help, Hoffman told him that Amanda would fail him. After their final conversation, Hoffman left the room through a hidden door. (Saw V)
The Final Tests
When the women entered the room, John greeted his new subject and former doctor, even though she couldn't remember him being one of her former patients and only recognized him from the news stories. After his introduction to her, he explained the rules she had to follow in order to survive. Amanda put a collar on her which was connected to John's heart rate monitor and would explode if John died or she moved out of his range. It was her task to keep John alive until her husband Jeff managed to finish a series of tests.
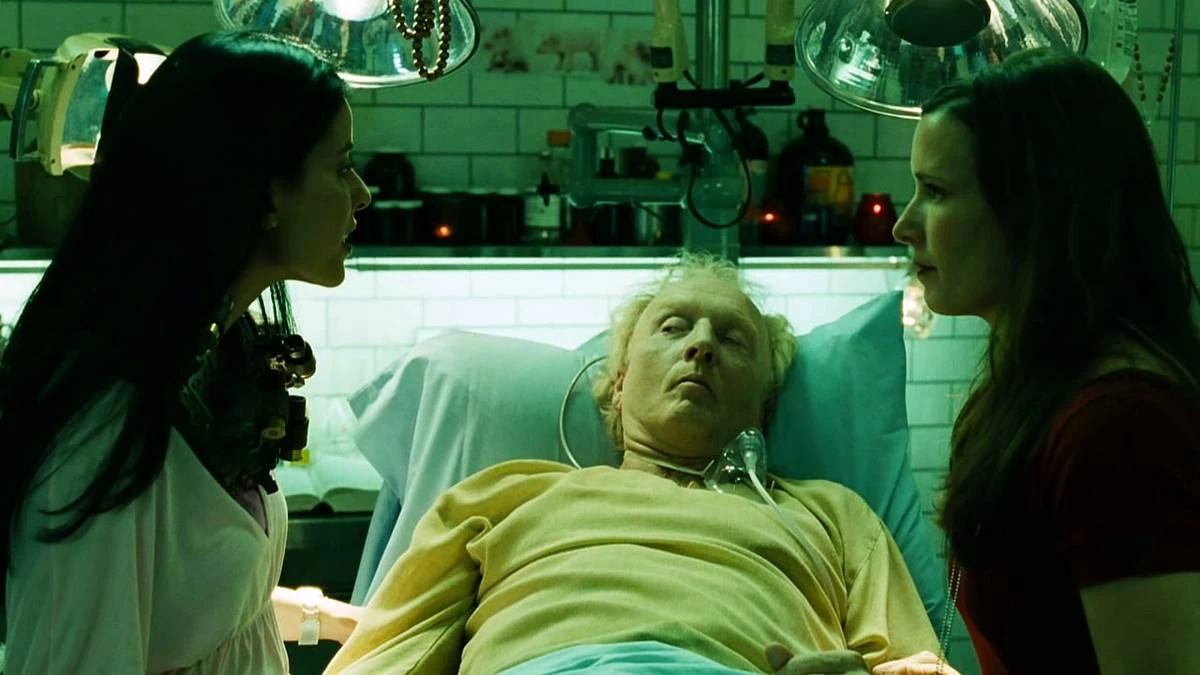

Lynn and Amanda discuss John's condition
Shortly thereafter, Lynn began her examination when Amanda told them that Jeff's game had begun. They got in an argument after Lynn told her that John had to be operated on in the hospital as soon as possible to decompress his herniating brain. When Amanda insulted and threatened Lynn, John told her not to do so, as Lynn couldn't do what she had to do under such pressure. Seconds later, he suffered an epileptic attack. He was saved by Lynn who finally convinced Amanda that John needed a professional surgery. Amanda demanded her to perform the surgery at the meatpacking plant before leaving to get the necessary supplies.
After her return, she sat at John's bedside while Lynn was preparing the surgery. Amanda told John about Jeff Denlon's progress in his game, after he had just finished his first test in a Freezer Room, where he wasn't able to save Danica Scott, the only witness of his son's death who refused to testify against the drunk driver. When she told John that Lynn was ready to perform the surgery on him, he encouraged Amanda to stay strong and told her about a letter for her in her desk.
When Amanda left John's room again and returned to the surveillance monitors, Lynn prepared everything for the surgery. Just when she shaved John's head, Amanda came back, telling them that Jeff had finished his second test and had been able to save the other test subject involved, Judge Halden. Therefore, John was surprised by his fast progress. After that, Lynn explained the procedure of the operation to him, which was going to ease his headaches and would enhance his motor faculties, before she injected him with a local anesthetic. Due to the complexity of the surgery Lynn had no choice but to do it while John was conscious. Lynn then partly cut off a part of his scalp in order to lay open the skull. After disinfecting the wound with alcohol, the hardest part of the surgery began. With the power drill, she bored four small holes in his skull. Afterwards, she used an electric circular saw to cut through the skullcap and finally removed a piece of it with a small retractor to take the pressure from head. After his vital functions stabilized, Lynn told him to raise his hand and flex his fingers. However, he suddenly suffered a breakdown, causing Amanda to burst into tears out of fear. While his heart rate declined, he had hallucinations about Jill. Lynn was just barely able to save him. Due to his delirious state, John confused her with his ex-wife and told her he loved her, causing Amanda to be jealous of the attention that John gave to her.

John prepares his last tape for Hoffman
Weakened by his breakdown, John fell asleep. While Lynn washed off his blood and took a look at the various paintings and drawings on the walls, Amanda entered the room and tightly hugged John. However, when Lynn told her that he couldn't hear her and didn't even know about her presence, she became angry and grabbed her by the throat. As she was about to pull her gun, John, who had waken up by the noise, intervened and told her to put the weapon away. After some hesitation, she did as he told her and was harshly ordered to leave. When they were alone, John apologized for her behavior, stating that while she was close to him, her strong emotions were her greatest weakness.
As time went by, he talked to Lynn about her family and advised her to appreciate them. He also talked about her depressions, her neglect of her daughter, and her affairs with other men. While doing so, he poured wax on a cassette tape and swallowed it. Angered by his accusations, Lynn told him that her marriage had survived more suffering than someone like him could possibly ever imagine. However, John merely responded that she didn't know what true suffering meant yet. Lynn then begged him to let her go, when moments later, Amanda reentered the room and saw how he hold Lynn's hand. He told her he was fine and she could go away. However she refused to do so until John asked Lynn to leave the room so he could speak with Amanda alone. After a short discussion, he ordered her to send Lynn back to him. Upon Lynn's return, she begged John again to let her go, reminding him that she had saved his life. John however remarked that in the end it might not have been his life that she had saved and claimed that she would be grateful one day if she survived this experience. During their conversation, he asked her to tell him about her daughter and her son, asking her why she spent so much time on grieving about him while she had a wonderful family that needed her.
Moments later, Amanda reentered the room, telling John that Jeff had just finished his third test. Therefore, John congratulated Lynn and told her that she was now free to go. However, Amanda refused to unlock her collar as Jeff hadn't finished his trial yet. John repeatedly told her to let Lynn go and reminded her of the rules, but Amanda eventually pulled her gun and aimed it at Lynn, angrily stating that she doesn't deserve to live. Frightened by her threats, Lynn burst into tears and told her that Amanda had promised to let her go. When John told Lynn to put down the gun, claiming that it was Lynn who held her life in her hands, Amanda angrily yelled at him for giving Lynn the control over her. During their dispute, John asked her if this was how she had felt about her other test subjects, specifically Eric Matthews, and thereby revealed that he knew that John had manipulated her traps, giving her victims no chance to survive even if they managed to accomplish their tasks. John told her that he had forgiven her her past mistakes and tried to convince her to let Lynn go, as it would harm all of them otherwise. Amanda however still refused to do so, stating that John was just a murderer in her eyes just like her and that she didn't believe that anyone would ever change due to his games. When he told her that he had always just tried to help her, Amanda yelled at him to help her now as she needed him and asked her why Lynn was so important to him. He however claimed that she wasn't important to him but to her, which Amanda denied. He then tried to persuade her one last time to lower her weapon, when all of the sudden, Jeff appeared before the door of the room. As he and Lynn noticed each other, she went to him but was shot by Amanda in the back. Disappointed by this, John revealed to her that she had just shot Jeff's wife. Therefore, Jeff entered the room and shot Amanda in the throat with a gun he had found earlier. As she lay dying on the floor, John, saddened by her failure, revealed to her that he had tested her just like Lynn and told her that his initial instructions for Lynn, according to which she had to learn how to save a life, were meant for her as well. Realizing that she had been fooled by her mentor, Amanda eventually succumbed to her wound and died on the floor in front of John's eyes, who ended her test with the words "Game Over". (Saw III)
Death


Jeff prepares himself to kill John
After Amanda had died, Jeff aimed his gun at John. The latter berated him for not having learned anything from his test, stating that his thirst for vengeance would only harm his loved ones. Furthermore, he told him that he couldn't kill him. Despite this, Jeff eventually pulled the trigger, but didn't have any bullets left. John then told him that Lynn was about to die. When Jeff comforted her and promised to bring her home, she uttered that she loved him. John then warned him that she would die if he tried to bring her away and offered to call an ambulance. Jeff eventually agreed and asked John what he wanted in exchange for his help. John demanded one final test from him to see if he had overcome his obsession with revenge. Jeff could either kill him with the tools lying on a table in the room, or he could forgive John for all the pain he had caused him and his wife, proving that he had learned from his previous tests. Jeff got up, despite Lynn begging him to stay by her side, and grabbed a circular saw from the table. He then approached John and lay his hand on his chest, stating to forgive him. However, only seconds later he raised the saw and despite Lynn desperately yelling at him to stop, he eventually slashed John's throat, while claiming again that he had forgiven him. Seconds later, the collar around Lynn's neck was activated.
With the last of his strength, John took out and started a tape recorder, which explained to Jeff that John had been his final test of forgiveness. Furthermore, he finally explained him what he meant when he told him that Jeff couldn't kill him, stating that he had also abducted his and Lynn's daughter, Corbett, and was the only person who knew about her whereabouts. If Jeff wanted to see her again, he had to play another game. When the message ended, John succumbed to his wounds, activating Lynn's collar in the process, which killed her by blowing off her head. (Saw III)
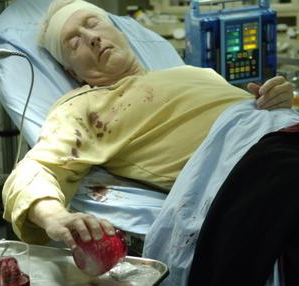
Post-Mortem

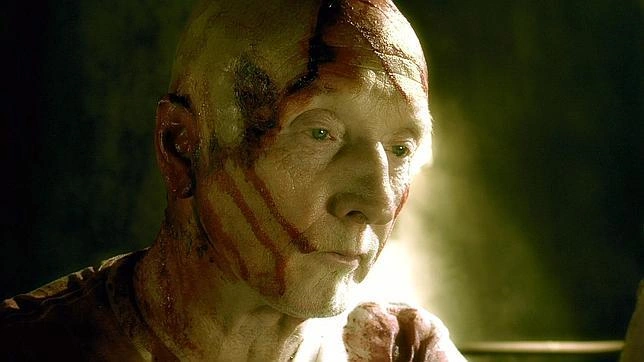
John's corpse
Just moments after his death, Peter Strahm entered the room and was threatened by Jeff, who demanded he tell him where his daughter was, causing Strahm to shoot him in self-defense. Moments later, he was trapped in the room by Mark Hoffman, who locked the door behind him and turned the lights off. When Strahm found the hidden door out of the room, he received an audio tape from John, who told him to stay where he was until the police arrived. However, Strahm refused to do so, and entered the secret hallway behind the door, leaving the dead bodies of John, Amanda, Jeff, and Lynn behind him. Shortly afterwards, the police finally arrived and took the corpses to the morgue. (Saw IV, V)


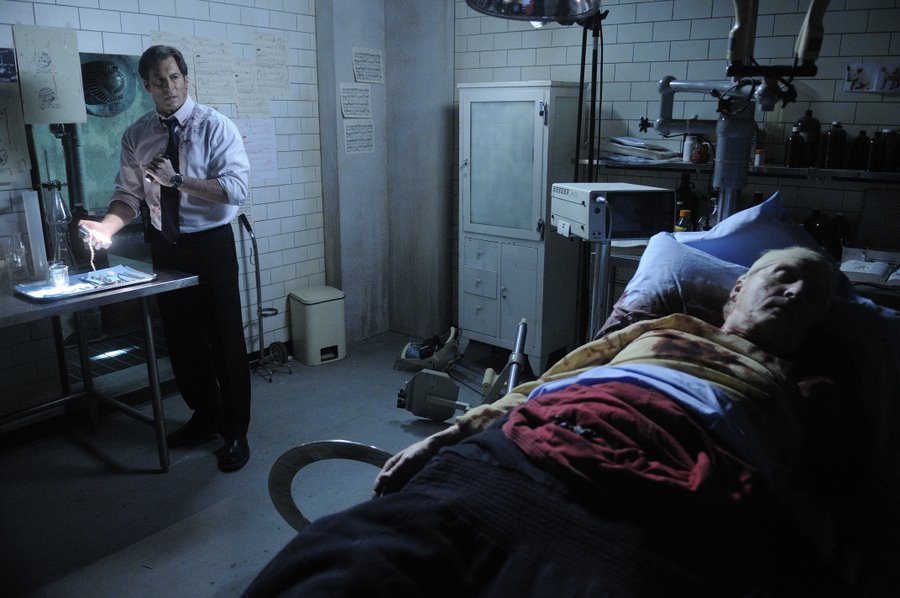
Dr. Heffner performs the autopsy on John
After the events at the Gideon Meatpacking Plant, Dr. Adam Heffner conducted an autopsy on John's body. Upon further examination of his stomach, he discovered the wax-coated tape John had swallowed after his brain surgery and called Detective Hoffman. When the latter arrived and listened to the tape, it was revealed that it was actually a message for him, claiming that the games had just begun, and that he would not get away untested. This threat soon turned out to be true, as Mark Hoffman continued to play John's games, just as the latter had told him to do before his death. Due to the new games and the increasing casualty figures, John remained the central figure of the Jigsaw story in the news reports, even after his death. (Saw IV, V, VI)
Non-Canon Appearances
Saw: Rebirth
John Kramer appeared in the animated comic Saw: Rebirth, which served as a prequel to the first three films. He worked at a toy factory and was not really ambitious and too lazy to make more of his life, which eventually caused his wife, Jill, to leave him. However, he still did not do anything to change and improve his life, until one day he got sick. As his physical condition began to worsen dramatically, he went to the hospital, where oncologist Dr. Lawrence Gordon diagnosed him with colon cancer and an inoperable brain tumor. During his time at the hospital, John made acquaintance with Zep Hindle, an orderly who was badmouthing the doctors behind their backs, telling John that they were all cold-hearted men, who cheated on their wives and didn't care about their patients. As he was about to lose his life sooner rather than later, he began to pay closer attention to the lives of others, starting with the other patients, such as Mark, a scam artist, and Amanda Young, a drug addict who nearly died due to an overdose of heroin. However, John was surprised when he saw Paul, one of his colleagues at the toy factory, who was at the hospital after an attempted suicide by cutting his wrists, even though he had a job, a wife and children.
Utterly depressed, John attempted to commit suicide on his own by driving his car off a cliff. However, he unexpectedly survived the crash, despite being heavily injured. When he climbed out of the wreck, John realized that only when his death was imminent he finally began to actually appreciate his life. As he observed other people wasting their lives, he decided to spend the rest of his life testing other peoples' will to survive, hoping to make them appreciate their life just as he did. He decided to start with the people he had met at the hospital and neglected his own needs for the sake of his mission. John educated himself in diverse fields and gained vast amounts of esoteric knowledge. He started to test and refine his traps he had prepared for his test subjects, until he was ready to finally begin his games.
Saw: The Video Game
John acted as the main antagonist of Saw: The Video Game, which was set right after the first movie. He found the unconscious Detective David Tapp, who was shot by Zep Hindle, when he pursued the latter to the place of Adam Stanheight and Lawrence Gordon's game. John took Tapp to the Whitehurst Insane Asylum, where he had already prepared a series of tests for Tapp, with the assistance of another secret apprentice, the Pighead, to heal the detective from his obsession of arresting him. John took care of Tapp's wound, and while removing the bullet from his chest, he also placed a key inside his body. Numerous other prisoners were trapped in the asylum. In order to escape, they had to follow John's instructions and kill Tapp to get the key from him, which would grant them their freedom. John himself was seen multiple times throughout the game in video recordings, in which he introduced Tapp to the hostages he had to save in order to pass his test. These victims included Amanda Young, the first known Jigsaw survivor; Jennings Foster, one of Tapp's former colleagues who once killed a man in a hit and run accident while being drunk; Melissa Sing, the widow of Tapp's partner Steven Sing; Oswald McGillicutty, a journalist who had intentionally destroyed Tapp's reputation; Obi Gee, who had put up a newspaper ad to be tested by Jigsaw as he saw the test as a gift, and Jeff Thomas, the man who was saved by Detective Sing in Jigsaw's hideout in the first film.
After Tapp had managed to free Melissa Sing from her trap, the latter refused to go with him and tried to find a way out of the asylum on her own. She was then sedated by John, who gave her another test. John had abducted her son, Franklin. In order to save him, Melissa had to keep Tapp on track by following the instructions provided for her. To prevent her from warning Tapp, John's accomplice, Pighead, also sewed her mouth shut before releasing her to accomplish her task.
John also placed numerous recordings in the asylum, such as a recording of an emergency call he made after he had slashed Tapp's throat in the first film.
Saw II: Flesh & Blood
John also served as the main antagonist of Saw II: Flesh & Blood, where he abducted Michael Tapp, the son of David Tapp, who had committed suicide after the events of the first game. John had prepared a test for Michael, with the assistance of his apprentice, Pighead II. During his tests, Michael had to save numerous other people from their traps. These victims included Henry Jacobs, the chief of the police department; Sarah Blalok, an informant of Detective Tapp; Detective Joseph Poltzer, one of Tapp's former colleagues; Carla Song, Dr. Gordon's medical student as well as his mistress, and Solomon Bates, an accountant involved in a housing development project with John Kramer and Art Blank.
At the same time, John also tested another subject, Campbell Iman, a drug addict who had terminal cancer, just like John. When both Campbell and Michael reached the end of their respective tests, they had to participate in one final test, which only one of them could survive, depending on the decisions of the player, resulting in two different endings of the game:
- Path of Flesh: When Michael survived the last test, John left a final message for him, offering him a final choice: He could leave, take his father's files that he collected throughout the game, and publish the truth they contained, or he could decide to become another apprentice of Jigsaw and help him to teach other people the value of life.
- Path of Blood: When Campbell survived the final test, John was already waiting for him. He told him that his son was safe, that he passed his test, and that all he had to do now was turn around and go away. However, Campbell yelled at him, screaming that he couldn't let his son live in a world with people like John in it, and then tried to attack him. John evaded his attack, resulting in Campbell being impaled by a scythe swinging down as he approached John, who ended the game with the words "Game Over."
The Scott Tibbs Documentary
John was frequently mentioned throughout The Scott Tibbs Documentary. After the disappearance of Adam, his best friend, the rock band leader Scott Tibbs decided to film a documentary about Jigsaw. While filming, Scott was called to the Wilson Steel Plant where he found out about Jigsaw's escape and the abduction of Detective Eric Matthews. During his research, Scott learned about Jigsaw's true identity and his terminal cancer which had led him to start his games. However Scott soon became obsessed with the killer and admired him to the point where he decided to test himself in order to prove that Jigsaw was right with the things he did.
Full Disclosure Report
John was also mentioned in the documentary Full Disclosure Report, hosted by TV moderator Rich Skidmore. The documentary focused on the early crimes of Jigsaw. During the broadcast, the audio tape from Paul Leahy's crime scene was played for the audience after it had been sent to Rich Skidmore and his team by an anonymous source.
Personality
John was a hard-working man, devoted to both his wife and his unborn son, but also to his work, which was dedicated to help those who were disadvantaged by society. He had strong convictions, and even before his transformation to Jigsaw, he believed that only the knowledge of impending death could show if a human was actually willing to fight for his life and survive. Additionally, he had a genius level intellect, as well as a great knowledge of facts on diverse fields, but he was also somehow spiritual and was interested in esoterics such as Chinese astrology.
However, when his son died and he was diagnosed with cancer, he became depressed and turned away from his wife. Eventually, he tried to commit suicide but survived. This incident caused him to realize that he actually wanted to live, and therefore, he decided to spend the rest of his life teaching other people the appreciation of their lives and the lives of the people around them.
When he became Jigsaw, he started to test peoples' will to survive by putting them in horrible, potentially deadly traps. Despite the immense brutality of his games, John took no pleasure from the suffering of his victims, but thought that it was necessary to make them cherish their lives. Throughout his murder series, he always tried to keep an emotional distance between him and his work and did not let his own feelings affect his mission.
John never doubted that his mission was necessary and that it was the right thing to do. He also saw it as a way of bringing justice to his test subjects for the things they did to themselves and others.
Behind the Scenes
Darren Lynn Bousman on Jigsaw
Darren Lynn Bousman, director of Saw II, Saw III, and Saw IV said: "He's not the typical serial killer. He's not some madman. He's not Jason or Freddy. He's not even Hannibal Lecter. He's a person with extreme beliefs and he really thinks he's making a difference. He's a vigilante if anything. He thinks he's making a difference".
Trivia
- In Saw, John attacked and nearly killed David Tapp by slashing his throat with a blade concealed in his wrist. However, it was established in Saw II and III that John considers directly killing someone or putting them in an inescapable trap as murder. In Saw: The Video Game, Tapp comes across an audio tape when Jigsaw phoned an ambulance, and seemed certain that Tapp was going to survive his injury, revealing that he did not intend to kill Tapp. However, he did order Lawrence Gordon to kill Mark Hoffman if he killed Jill Tuck.
- Tobin Bell is the only actor in the Saw films to appear for new scenes in every single movie, not including Shawnee Smith as Amanda Young, as she appears mostly in archive footage. He is also the only actor to do voice work for both the Saw game adaptions Saw: The Video Game and Saw II: Flesh & Blood, and also gave his likeness for Jigsaw in the second game.
- It is interesting that in Saw V, John tells Hoffman that their work can never be personal, but William Easton probably would not have been tested if he would not have denied John health care, making that test personal, also with John showing himself on the tapes. It is possible though that John realized this and included the test in Jill's box, which was to be opened after his death, so William would be tested after he died, and he could not be personally involved in his game. However, it is unlikely that he had any real personal motivations to test William, as his company was responsible for denying health insurance in many other cases, such as Harold Abbott.
- In the game, Heavy Rain, the main antagonist, the Origami Killer, has a very similar M.O to Jigsaw. He puts his test subjects through many horrific trials, that cause severe physical risk, and in one instance, self mutilation, to see if they have the will to do what's necessary to survive/save a loved one. Both also have many different locations where their "trials" are housed. The Origami killer even uses the name John as an alias (though this is coincidental given that the Origami killer is using the name of his deceased brother.) One difference, however, is that John never kills directly. Furthermore, the characters Gordi and Charles Kramer share a surname with John. The former of which was presented as a suspect in the Origami Killer case, as was revealed to want to be like him, which resulted in the death of a child.
- John's car is a 1977 Oldsmobile Ninety-Eight Luxury.
Appearances and References
| Films | |||||||||
| Saw | Saw II | Saw III | Saw IV | Saw V | Saw VI | Saw 3D | Jigsaw | Spiral | Saw X |
| Appears | Appears | Appears | Flashback, Pictured, & Corpse | Flashback, Pictured, & Corpse | Flashback, Recording, & Mentioned | Flashback & Mentioned | Absent | Absent | Absent |
| Other Media | |||||
| "Saw" (2003 Short) |
Saw: Rebirth (2005 Comic) |
Full Disclosure Report | The Scott Tibbs Documentary | Saw: The Video Game | Saw II: Flesh & Blood |
| Absent | Appears | Recording & Mentioned | Mentioned | Appears | Appears |